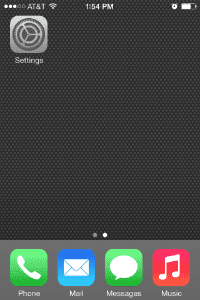
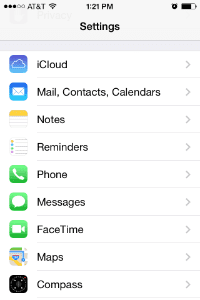
1. Click Settings.
Generally, the Settings icon appears in one of your device’s main screens.
The Settings menu will appear
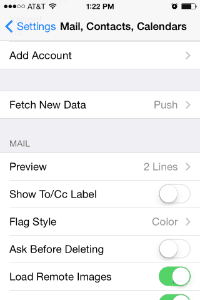
2. Click Mail, Contacts, Calendars.
Click Mail, Contacts, and Calendars in the Settings menu.
The Mail, Contacts, and Calendars menu will appear.
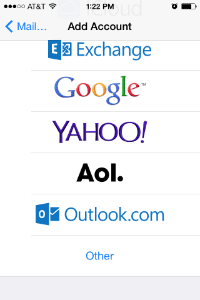
3. Click Add Account.
Click Add Account in the Mail, Contacts, and Calendars menu.
The Add Account menu will appear.
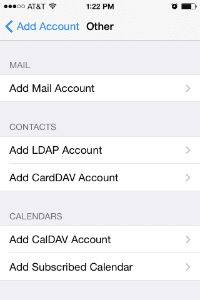
4. Click Other.
Click Other in the Add Account menu of mail account types.
The Other menu will appear.
5. Click Add Mail Account.
Click Add Mail Account in the Other menu.
The New Account interface will appear.
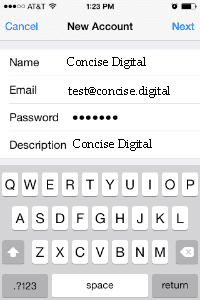
6. Enter your account information and click Next.
Enter the following information in the New Account interface’s text boxes:
Click Next to proceed to the next screen in the New Account interface.
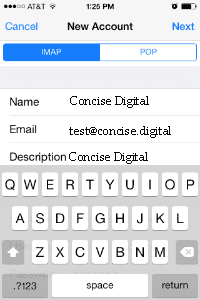
7. Select a mailbox type and verify information.
Use the toggle at the top of the screen to select a mailbox type.
Note:
We recommend that you select the IMAP mailbox type. If you select the POP3 mailbox type, the mobile device’s email client will download all of the account’s email messages, and then remove the messages from the server. You will not be able to access those messages from any other email client.
Verify all of the information for your account, and then click Next to proceed to the next screen in the New Account interface.
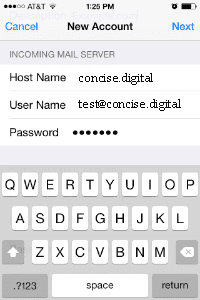
8. Enter information for your incoming mail server and click Next.
Enter the following information in Incoming Mail Server text boxes:
Click Next to proceed to the next screen in the New Account interface.
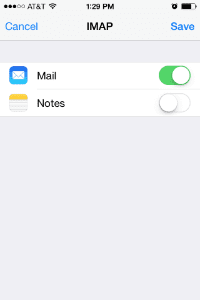
9. Disable the Notes toggle and click Save.
click the Notes toggle to disable the Notes application for the account.
Then, click Save to complete the account setup process.